Are you tired of figuring out how to install a GFCI outlet on your own? We’ve all been there – those unintelligible diagrams that leave us more confused than when we started and wondering where the wires from our wiring box even go. But have no fear – this blog post is here to simplify electricity for everyone. Here, you’ll find step-by-step instructions for properly installing GFCI outlets and valuable safety tips to protect yourself and your home from potential electrical hazards.
Keep reading to learn everything you need to know about installing GFCI outlets in just a few easy steps!
Understanding GFCI Outlets
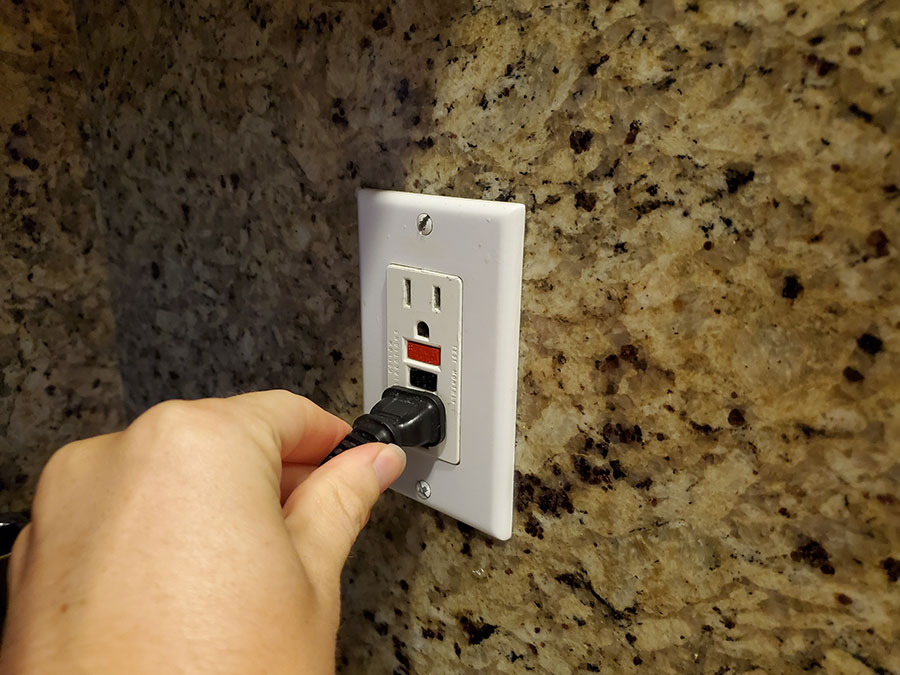
Ground-Fault Circuit Interrupters (GFCI) outlets are life saving devices that rapidly shut off the power when dangerous fault currents are detected. GFCIs monitor the current running through hot and neutral wires and instantly cut power when it senses an imbalance. This is extremely important for preventing damage due to electrocution. GFCI outlets are commonly found in bathrooms, kitchens, garages, and outdoors since the code requires GFCI protection anywhere water can come into contact with electrical wiring or devices.
GFCI outlet installation should be handled correctly, as incorrect wiring may not provide protection. Furthermore, considering its importance in avoiding fires or electrocution, GFCI outlet installations should meet local codes to give optimum safety to everybody.
Preparing for Installation
To install a GFCI outlet, you’ll need the following tools:
- 4-in-1 screwdriver
- Electrical tape
- Needle-nose pliers
- Non-contact voltage tester
- Utility knife
- Voltage tester
- Wire stripper/cutter
As well as these materials:
- Electrical boxes
- Electrical cable
- GFCI outlet
- Wire nuts –
- Wire staples
Safety should be your number one priority if you’re prepared to take on GFCI installation yourself. Before starting the project, double check you have all the necessary tools and protective gear, including gloves and safety glasses. You should also ensure you understand electrical wiring principles before tackling GFCI outlet installation – this should include an overview of household wiring systems and familiarizing yourself with color codes and symbols associated with home wiring.
These precautions can help ensure a safe GFCI outlet installation that will keep your home electrically secure long after the job is finished.
Step-by-Step Guide to Installing a GFCI Outlet
Installing a GFCI outlet can be one of the safest decisions you make when updating the wiring in your home. If your current outlets don’t have this safety feature built-in, consider taking additional steps to protect yourself and your family from electrocution or electrical fires. With just a few easy steps and minimal materials needed, installing a GFCI outlet can take a little time.
- Turn off the power to the circuit you’ll be working.
- Remove the cover plate and unscrew the outlet from the box. Disconnect and take out the old unit.
- Locate the screw terminals marked “load” and “line” at the back of the GFCI, with a single grounding screw at the bottom.
- Attach both black and white wires to those terminals on the line side.
- Securely fix each wire – black to dark-colored screw, white to light-colored screw – on the “line” side.
- Coil any bare copper wire around its corresponding grounding screw, then tighten it.
- Tuck all wires into the box as appropriate, then securely fasten them in place & replace the cover plate.
- Press both the “test” (power off) & “reset” (power on) buttons to check the proper operation of GFCI.
- Power off the kitchen by switching on the main service panel before removing the old outlet inside the box.
- Install a new GFCI outlet by attaching black/white wires to the “line” side, and connect the bare wire to the ground screw post.
- Reconnect the cover plate afterward & test/reset it once more for verification of proper operation.
Tips and Tricks for Installing GFCI Outlets
With the help of these essential tips and tricks, installing GFCI outlets can go smoothly. Get informed on ways to complete this job with ease and safely.
- Read the manufacturer’s instructions thoroughly. Pay special attention to the recommended wiring methods. Not all manufacturers recommend the same technique.
- Measure twice, cut once: carefully measure your wall space to ensure you purchase the correct size outlet and cut holes in necessary spots that perfectly fit your new GFCI outlet box.
- Ensure wires are tucked securely into their terminals, and always use wire nuts when connecting multiple cables.
- Install a dedicated ground by connecting it directly to a metal water pipe or cold water line to provide proper grounding protection for your GFCI outlet. If no dedicated ground line is present, use a green-coated grounding screw to complete this step correctly.
If you’re looking to install GFCI outlets, the crucial starting point is selecting the right product. Here’s a tip: only go with well-known brands like Leviton and GE, who make reliable, quality products. In addition, double-check that the outlet is labeled for use with Ground Fault Circuit Interrupters. Finally, stay safe by choosing only UL-listed models for indoor use, and if you’re installing outdoors, be sure to buy a weather-resistant one specifically designed for outdoor installation.
Troubleshooting common problems is vital when installing motors like GFCIs – always check on the manufacturer’s website for technical notes about reliable testing methods as well as what causes common errors during installation or operation of these devices before submitting repair requests or replacing them entirely with newer models if they become faulty over time.
Conclusion
As electricity is an essential part of modern life, it’s important to be aware of its potential risks and take action to stay safe. These steps can help ensure your home remains safe and secure for you and your family. If you ever need help with the electrical installation and troubleshooting, please don’t hesitate to contact Smith & Jones Electric. Learn more about how we can assist you in achieving a safe and well-functioning electrical system for your home or business.
We help companies refine their messaging, hone in their sales process, and grow their pipeline – all with a new website.


